BadgeMaker Design: How to add a passport photo, signature and a dynamic logo
Thank you for choosing the ID card maker BadgeMaker, this post shows you how to use placeholders for dynamic data like an ID photo, signature or a dynamic logo in your card design.
Step 1. Add an ID photo placeholder
To personalize a card, you can add a placeholder for an ID photo, that is automatically linked to the card holders’ ID photo’s in your BadgeMaker Identity project.
Click on the ID Photo tool in BadgeMaker Design and click on the front of the card. Resize the ID photo element to your liking. You can add a border to frame the photo. Go to Element Properties, click on the style tab and change the border thickness.


Step 2. Add a Signature placeholder
A signature placeholder can also be added to your card design. The signature placeholder is also linked to the cardholders’ signatures in your BadgeMaker Identity project. The placeholder shows a dummy signature. Click on the signature tool and then click on frontside of the card. Resize the placeholder to the needed size and drag it to the correct location for your card design.


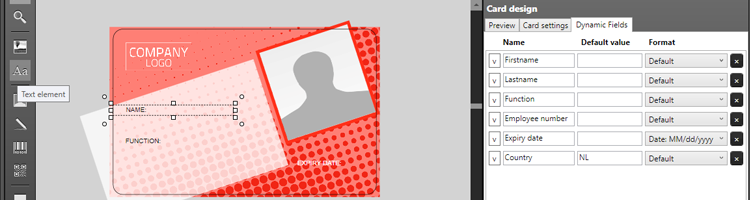
Step 3. Add a Dynamic logo
Click on the Dynamic logo tool in the BadgeMaker Design toolbar, click on the card in the canvas and go to the first tab of the “Element properties”. Select the dynamic field representing the needed data for the dynamic logo.
Keep the aspect ratio and keep the interpolation mode set to default. Now add the dynamic logos, the images need to represent four countries so add four images. Click on the “…” button to select the flag images.
To get the correct flag to appear with the correct card holders’ country, add the associated value. This value needs to be the exact value corresponding with the data in the project. We will add USA, CA, UK and NL.
Do not forget to save the card design. You are now ready to use your card design in BadgeMaker Identity and create a project with card holders.
Thank you for choosing id card maker: BadgeMaker