BadgeMaker Identity – How to import data from an Excel file
Thank you for choosing the card print software: BadgeMaker. This post shows how to import cardholders’ data into your project in BadgeMaker Identity. Records are single data rows that contain information of one person. There is a button for adding and deleting a single record manually. To add multiple records, you can choose to import an Excel file.
First step is open a existing project in BadgeMaker Identity.

Step 1. Import data
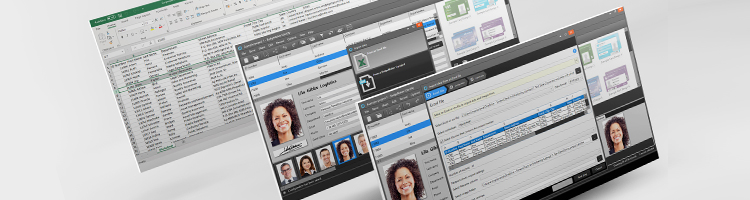
Go to “File” in the main menu of BadgeMaker Identity, click on “Import data” and select to import “From an Excel file”.


Step 2. Select Excel file
Select an Excel or CSV file with card holders data to import the needed data from. The data from the Excel file is now shown in the overview. If needed you can select a specific worksheet from your Excel file. Now select the row that contains the column names in this overview.
You can also batch upload the passport photos along with the card holders’ data. Select the column, the filename is corresponding with, and then select the folder with the photos you like to add to your project.

Step 3. Bind the data to the correct project column
The next step is how to import the new records and which data column uniquely identifies with the records. Check if the data from the Excel is directed to the correct data column in the project.
The next step is to import the data from your Excel file and the photos into your project.
Your project in the BadgeMaker card print software is now updated with the data from your Excel file.